The Definitive Guide to Shopify Image Sizes in 2025

Shopify image sizes can be a merchant’s minefield.
Choose the best image sizes and your store will look amazing on every device. Choose the wrong ones and well, your sales will plummet.
In this post, we’ll cover everything you need to know about Shopify image sizes. By the end you’ll be poised to optimize all of your images and deliver the best shopping experience possible.
Sounds good? Let’s jump in.
Why Shopify Image Sizes Matter
Imagine you walked into a store and everywhere you looked there were products thrown about on shelves. Imagine the layout of the store was difficult to navigate, and the merchandising had no consistent style.
You’d probably turn on a dime and head out the door, right?
Well, this is what happens when you don’t optimize your shopify picture sizes correctly. Your store can feel messy, unorganized and unprofessional - read: not good.
What’s more, improperly sized images can affect your store's loading time. And we know that a slow loading store can absolutely tank your conversions.
Even if you're selling the best products to sell on Shopify - If your store currently looks like you’ve simply plucked your product images straight from the manufacturer, or contains grainy low-res photos, then it’s time to do something about it.
When you optimize the images for your store, you’ll deliver a cleaner, more enjoyable shopping experience that results in more conversions and sales for your business.
📝Editor’s Note: How much extra revenue can you make?
Optimizing images is an amazing way to boost conversions. But another essential tactic is adding upsells to your store. ReConvert lets you add a fully optimized upsell funnel in just a few clicks. How much extra can you make? We analyzed 10,000+ data points from stores like yours, so you can answer the question yourself. Try our free upsell revenue calculator today!
Best Image Sizes For Shopify Stores
So, with the benefits of properly sized images in mind, here’s what you need to know about the different types of image sizes for Shopify.
First up, you’ll want your images to be large enough to show your product in detail, while at the same time, keeping them small enough to allow for speedy loading times.
When it comes to Shopify images sizes, generally the maximum size you can have is 4472 x 4472 pixels totalling a size of 20mb. Now, this doesn’t mean you should use images of such magnitude - it’s just the upper limit of what’s possible.
Typically, most Shopify experts advise that for square images you stick to a size of 2048 x 2048 pixels to hit the sweet spot between size and speed.
It’s also important not to go too small. Shopify product images that are smaller than 800 x 800 pixels won’t be able to be zoomed upon. This is a key consideration when thinking about how to maximize conversions.
Each Shopify theme may have it’s own specific image requirements. Different themes can crop your images differently which can affect how your store looks and feels. Therefore it’s essential to follow the image size requirements of your theme for best results.
One option is to choose a theme that comes with auot-image optimization like the Electro theme. However if you've already choen your theme and built your store, you might not want to go back and start again from scratch.
Now, I realize that such advice is rather vague, so allow me to expand with information about how to size your images properly for different functions.
Shopify Product Image Size: 2048 x 2048px
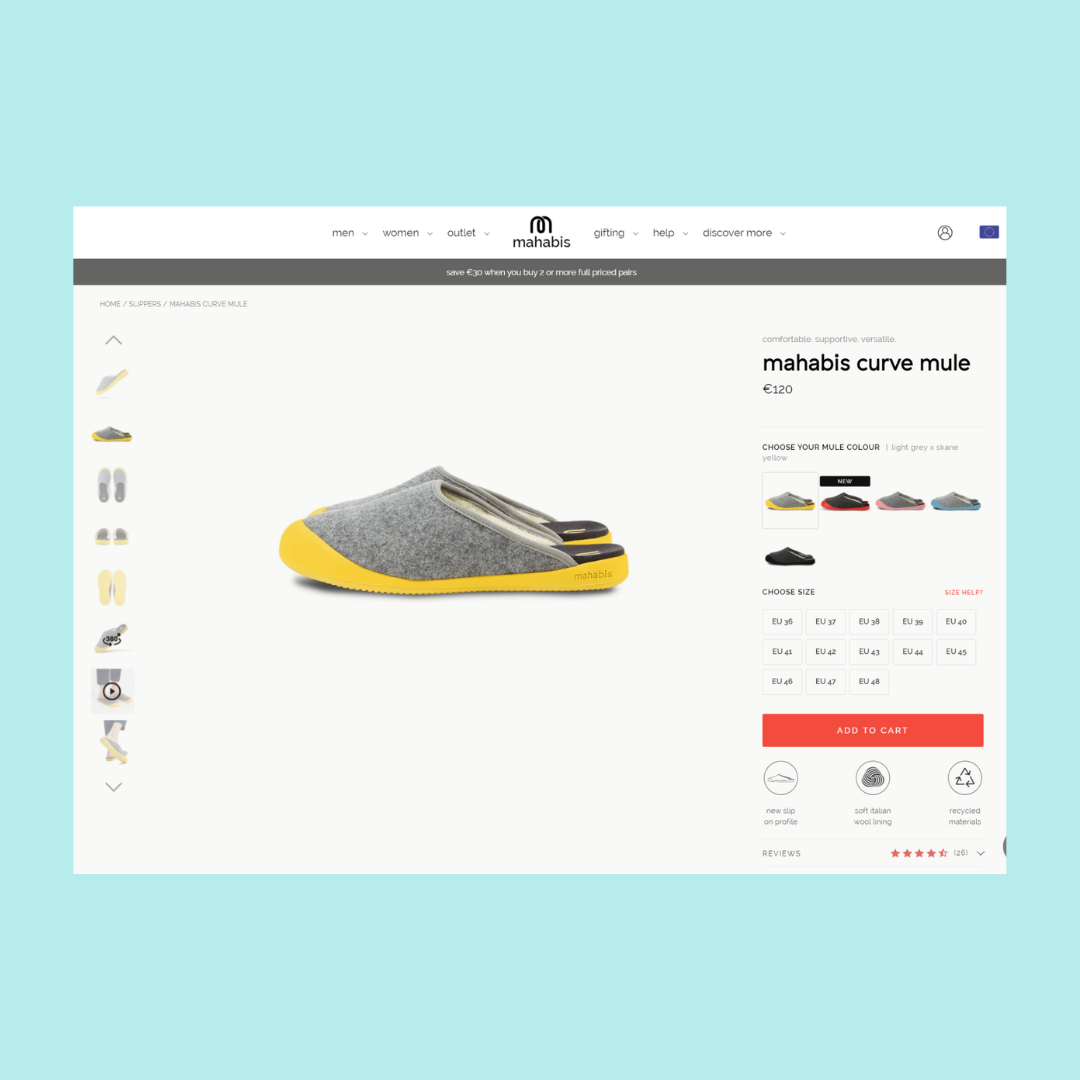
Nailing your Shopify product image size needs to be your number one priority. Seriously, your product images are at the heart of what makes conversions happen in your store. Low-res, un-zoomable images simply won’t cut it here.
Given that shoppers can't physically inspect your products, you need to recreate that experience as much as possible with your images. People may need to evaluate the texture, material or other details up close before they’re ready to buy.
If the majority of your traffic comes in from mobile devices, then square images are the best way to go. Your Shopify theme will automatically resize images for the best user experience, and on mobile square images with your product centered produce optimal results.
For sizing, remember that it needs to be at least 800 x 800 pixels so customers can use the zoom function without seeing a pixelated blur on closer inspection. Also, once you’ve uploaded your images, always check them on both mobile and desktop to ensure everything looks good.
For each product Shopify allows you to upload 250 images - obviously this is overkill, but it is worthwhile uploading more images than less. Try to mix lifestyle images with pure product photography and display your products from multiple angles too.
For more on how to actually take good product photos, check out Shopify’s helpful product photography guide for making your products pop, even if you’re on a budget.
Shopify Collection Image Size: 2048 x 2048
A Shopify collection is a group of products on your online eCommerce store pages. Since the images are side by side, it’s essential to make sure all the Shopify images in your collection have the same image aspect ratio and image sizes. It’s extremely obvious if one product image does not have the same size as the others.
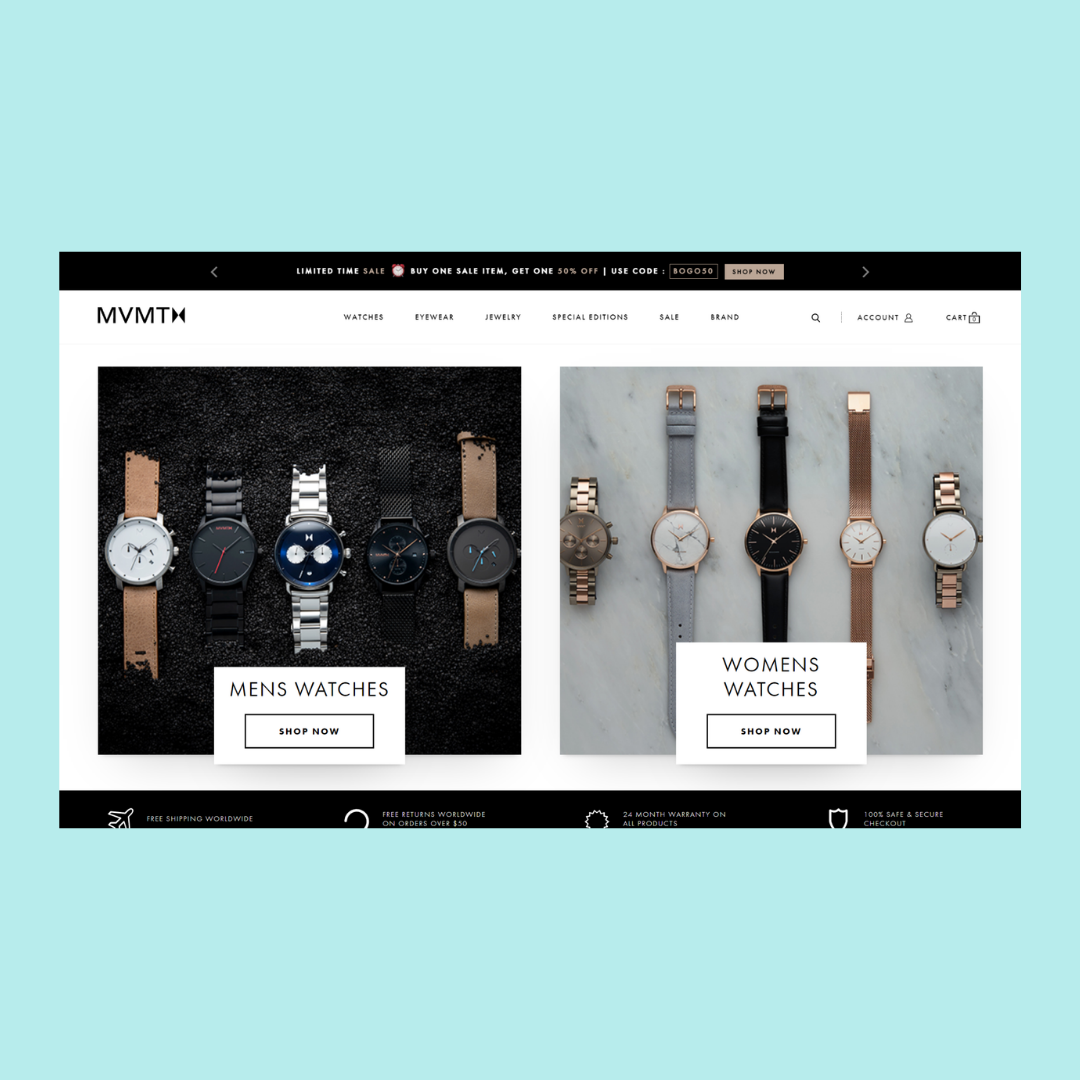
Shopify Slideshow Image Size: 1200-2000 width x 400-600 height
For many themes, the first thing your visitors will see is your homepage slideshow. That’s exactly why you need to make sure your image parameters are on-point here.
Large, high-definition images that pop off the page and snag attention are the order of the day. Now, different themes have different slideshow sizing requirements. For example, the popular Debut theme has four factors that’ll affect how your images display:
- Aspect ratio (aka width-to-height ratio)
- Image size
- Position settings for your image
- Slide height settings
Because the slideshow ‘slides’ from one image to the next, it’s a good idea to ensure all images are the same aspect ratio. This keeps things looking consistent and professional.
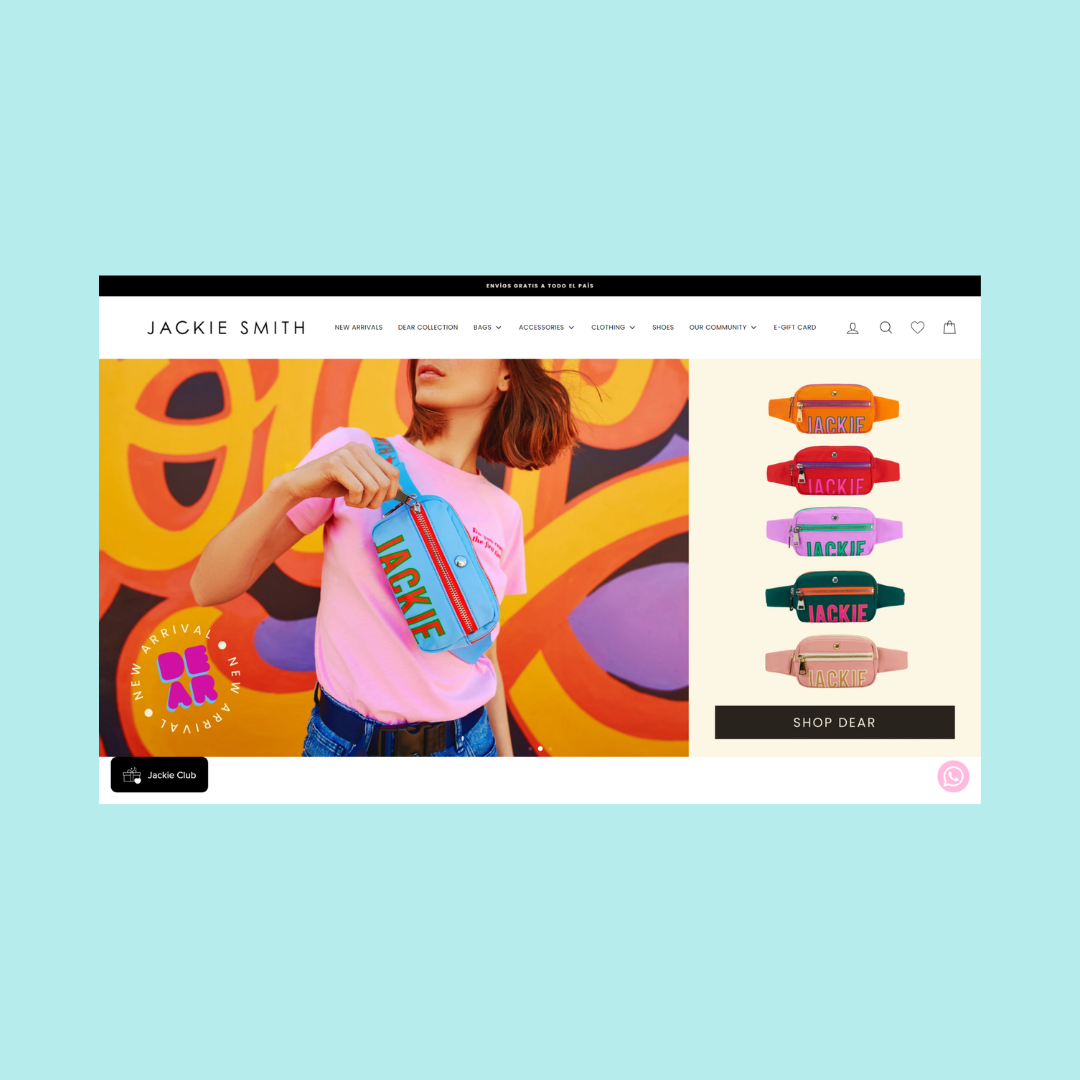
Shopify Banner Image Size: 400-600 width x 1200 height

Shopify banner images are quite similar to slideshows and often feature text overlaid. You’ll find them at the top of your homepage - and they're the first thing new visitors see, so you’ve got to make it count.
Just like your slideshow images, using high resolution images here is non-negotiable. It’s also worthwhile keeping the background toned down to give your text a chance to pop. Too much background noise will lower the contrast and confuse visitors.
Each theme has different requirements for banner images, so be sure to check what’ll work best on your store. You may also need to consider defining the height of your images for mobile devices. With banner images, quite often what looks good on desktop can be awful on mobile.
For example, when using the popular Debut theme, the sides of your banner image get chopped off on mobile. It’s possible to remedy this by adding code to change the alignment, aspect ration and padding. If coding isn’t for you, you can also just use a hero image with your design and copy in the center of the image so it appears on all devices.
With Debut, there is no specific size recommended for banner images, however, a width of 1200-2000 pixels and a height of 400-600 pixels generally works well.
Shopify Logo Image Size: 450 height x 250 width

Of all Shopify image sizes, the logo is one that throws many merchants off. I know I’ve had my fair share of uploading logos that look way out of whack with the rest of the site.
The official Shopify logo image size recommendation is no larger than 450 height x 250 width. This of course doesn’t mean your image size has to be exactly those dimensions. However, in many themes, the sidebar is 250px wide, so keep your logo below that figure for the tidiest appearance.
You may also opt to go with a square logo (aspect ratio 1:1) as this type of image will look good just about anywhere on your site. Again, keep an eye on the maximum dimensions - 200px x 200px is a safe bet here. Again, some themes (such as the Turbo theme) may have special requirements so always check first!
Pro Tip: Don’t have a logo? Use Hatchful - Shopify’s free logo builder to create a simple logo for your store today.
Image Optimization: How to Perfect Your Shopify Image Formatting
Ok with a handle on the best image sizes for your Shopify store, the next thing to consider is what kind of image formats you’re going to use.
Let’s explore some of the most common image formats found in the world of eCommerce photography from Jpegs to PNG images. Each comes with their own pros and cons you need to be aware of.
1. JPG/Jpeg
JPG is probably the most commonly used image file type for Shopify stores. It’s got excellent colour range plus a small file size which lends itself to speedy loading. JPG’s compression abilities offer an excellent balance between quality and size. It’s for this reason that Shopify actually recommends merchant’s use JPG for images on your product page.
2. PNG
Another super common image format used in Shopify stores is PNG. PNG is awesome for eCommerce websites because it allows you to reduce image file size, without reducing overall image quality. Plus, PNG also supports transparency which gives you greater control over your store’s design. One problem with PNG is it’s lossless compression - this means the image file size can often be very large.
3. GIF
GIFs are a universally known image format that are useful for short animations or product explainers (Super popular on Shopify Dropshipping Stores). The GIF image format limits your pictures to only around 250 colours, so they’re not the most vibrant. However they can work great when used in conjunction with other image formats.
4. TIFF
TIFF is a useful image format that’s supported by several web editing apps. This means it’s easy for designers and merchants to edit their images and tailor them for marketing campaigns. TIFF offers high resolution and allows you to save several images in one file. However, like PNG, thanks to lossless compression, the file size tends to be on the larger side.
If you’re confused about which image size to use, then it’s always wise to opt for JPG/Jpeg. As we mentioned before, JPG strikes the balance between file size and image quality better than any other image format.
Expert Tips for Optimizing Your Shopify Images For Conversions
Ok, with the best Shopify image formats and sizes under our belts, let’s look at how you can go above and beyond your competitors and create images that directly contribute to more conversions and sales.
1. Give Your Images Names
Most merchants power through hundreds of product images without pausing to change the default camera name.
But as someone with a penchant for SEO, I can tell you that this is a massive mistake. See, your image names play a role in ranking your product pages for specific keywords.
Search engines not only crawl the text on your pages, but they also assess image file names to better understand the content of the page.
For example, take this product page from Allbirds:
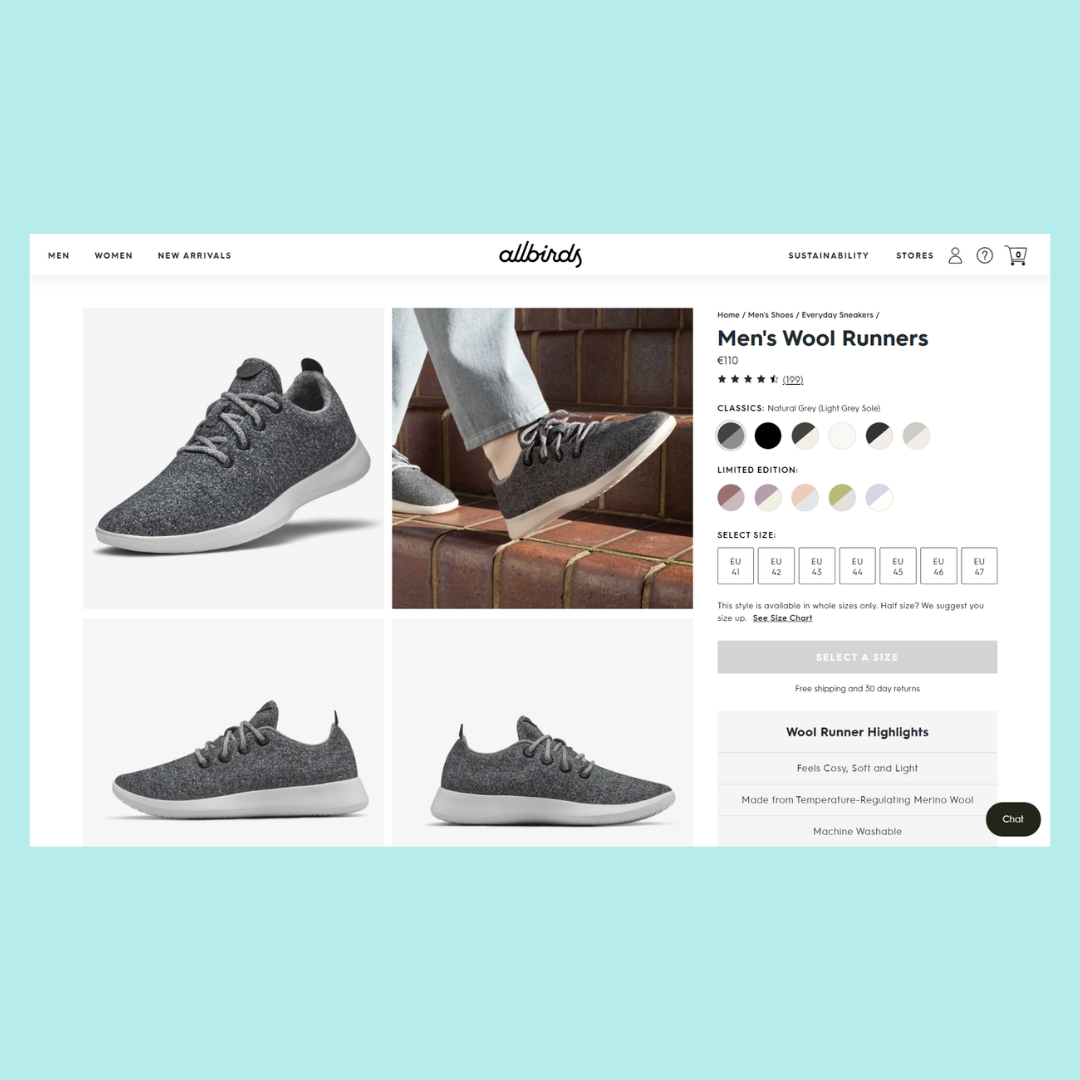
Instead of just going along with the standard camera file name (DCHIMAGE110.jpg), Allbirds have renamed each file with a descriptive title: ‘Men_s_Wool_Runners_-_Natural_Grey__Light_Grey_Sole’
This helps Google to understand and serve this page to prospective customers who are searching for terms like ‘Grey wool runners’, and can help you rank higher in Google. Doing this along with the other best practices for SEO can help your images show up in the image pack, at the top of a Google search.
2. Compress Your Images
Almost 50% of consumers won’t wait even 3 seconds for an ecommerce site to load. So, it’s imperative that you do everything in your power to speed up your pages.
Decreasing the file size of your images is one of the most effective ways to tackle slow page speeds. A good rule of thumb for image sizes is to keep them under 70kb for optimal performance.
Thankfully, Shopify already compresses your images to some extent. However, you can also use free tools TinyIMG or CrushPics to compress your images too. Such tools allow you to control the amount of compressions and bulk-process many files at once.
3. Use a Consistent Style Across Your Online Store
Human eyes love consistency. When selecting images for your store, always keep things looking consistent to create a more professional feel. For example, check out how Shuppa uses a palette background combined with simple product photography to deliver a slick browsing experience.

Obviously, you can arrange a professional photoshoot to capture similar images. However, if you’re on a budget, digital tools like photoshop and Canva both have the ability to remove/add backgrounds to create this consistent visual shopping experience.
4. Include Lifestyle & Product Photography
For most products, a combination of both regular product photography and lifestyle images will help you get the most conversions. Pure product photography is important so customers can inspect product details - while lifestyle shots help users visualize the product in real life. For example, here’s a kids duvet set from Hemtex:

See how styling the product in lifestyle pictures increases it’s emotional appeal? This is the same effect you also want to create with your products to boost conversions and make more sales.
5. Use A/B Tests to Find the Best Images
Finally, just like everything else in your store, you should be testing your images to see what performs best. You can test things like:
- The number of product images per page
- The styles of images that work best
- How many images you have on each product collection page (10, 20, 100)
You can use a heat mapping tool like hotjar to see how customers are interacting with your images. Or another simple way to gather feedback from customers about their image preferences is with a simple post purchase survey on your thank you page.
How to Add Shopify Images to Your Store
Adding images to your Shopify store is a straightforward process. Here's a step-by-step guide on how to do it:
- Log in to your Shopify admin dashboard.
- In the left-hand menu, click on "Products" to manage your products.
If you want to add images to an existing product:
- Select the product you want to add images to, or click on "Add product" to create a new one.
- In the product editor page, scroll down to the "Images" section.
- To add a new image, click on "Add image."
- To replace an existing image, hover over the image thumbnail and click on the "X" button to remove it. Then click on "Add image."
- In the image dialog box, you have several options to add images:
- Upload: Click on the "Upload" tab to upload images from your computer. Select the image file(s) you want to upload and click on "Open" (or equivalent on your computer).
- Select from library: Click on the "Select from library" tab to choose from images you have previously uploaded to your Shopify account.
- Use a product image: If you have other products, you can choose an image from one of those products to reuse.
- After selecting or uploading the image, you can adjust its position within the thumbnail frame, crop it, and add alternative text (alt text) for accessibility purposes. You can also add additional images by repeating steps 4 to 6.
- Click on the "Save" or "Save product" button to save your changes.
If you want to add images to a page, blog post, or collection:
- Click on "Pages," "Blog posts," or "Collections" in the left-hand menu, depending on where you want to add images.
- Select the specific page, blog post, or collection you want to edit, or click on "Add page," "Add blog post," or "Add collection" to create a new one.
- In the page editor, scroll down to the content section where you want to add the image.
- Click on the "Insert image" button in the editor's toolbar. It usually looks like a picture or frame icon.
- In the image dialog box, follow the same steps as mentioned above in Step 5.
- Adjust the image settings, such as alignment, size, and alt text if necessary.
- Click on the "Insert" or "Save" button to add the image to your page, blog post, or collection.
Remember to save your changes by clicking on the "Save" or "Publish" button after completing the steps.
That's it! You've successfully added optimized images to your Shopify store.
Free Shopify Image Size Apps & Tools
Below are some resources that will help you optimize your image sizes:
- Shopify Image Resizing Tool - a nifty tool that does exactly what it says on the tip - resize your images quickly and easily for better performance.
- Google Page Speed Insights - A helpful tool from Google that’ll help you weed out slow-loading images on your site for snappier loading times.
- Unsplash - a collection of high-quality royalty-free images you can use on your store and in your marketing campaigns
- Burst - a similar collection of professional images from Shopify for use in your store and marketing efforts.
- Canva - A handy image editing tool without the steep learning curve of photoshop. Use it to resize, edit and change the file format of your images.
Go Forth & Optimize Your Shopify Image Sizes!
Optimizing your Shopify image sizes can be a tall order. It’s one of those jobs that you think will take you an hour or two, but ends up taking much, much longer.
However, if creating a killer shopping experience is your aim, you must spend time refining your images for performance and sales.
Remember, in ecommerce, customers can’t physically hold your products. That means your images are literally one of the most important components influencing their buying decisions.
Remember, that lots of Shopify themes have unique image size requirements, so always double check to ensure your images are on point.
Optimizing your image sizes is a great way to boost your conversions.
But if you’re looking for another way to get more conversions check out ReConvert - it’ll help you upsell customers post-purchase for a bigger cart value and beefier profits. Get started today with a 14-day free trial!
Shopify Image Sizes FAQ
Here are a few of the most common questions we see on the web about Shopify image & banner sizes:
Does Shopify Reduce Image Size Automatically?
Shopify automatically reduces & compresses image sizes for merchants, but it's not always enough to create a fast storefront.
In cases like these, we recommend a free tool like TinyIMG to quickly compress images without losing quality.
Is there a Best Shopify Image Size?
Shopify doesn't set a one-size-fits-all for images, instead- There are ideal sizes for different types of images.
Shopify banners should be different sizes than your product images, which shouldn't be the same size as your logo, and so on.
Luckily, the guide above should give you all the information you need to optimize your store's images.
On Shopify, what are the optimal image sizes?
When it comes to optimal image sizes in Shopify, it's important to consider both the dimensions (width and height) and file size. Here are some general recommendations:
Product Images:
- Shopify main product image size: Shopify recommends using square images with a minimum resolution of 2048 x 2048 pixels. This ensures high-quality zoom functionality and compatibility with various themes.
- Additional product images: Use consistent dimensions and maintain a ratio to keep the product gallery visually appealing.
Collection Images:
- Shopify collection thumbnail images: Recommended size is 800 x 800 pixels to maintain quality across different devices and themes.
- Shopify collection header images: Sizes may vary depending on the theme, but a common recommendation is around 1600 x 600 pixels. See above for more specific recommendations.
Homepage Images:
- Shopify Slideshow/banner image sizes: Check your theme documentation for recommended dimensions. Common sizes are often around 2000 x 800 pixels. See above for more specific recommendations.
Blog Images:
- Shopify blog post images: Sizes can vary depending on the theme, but a common recommendation is around 1200 x 800 pixels. See above for more specific recommendations.
It's important to optimize your images for web use to ensure faster loading times and better user experience. Consider the following tips:
- Shopify File Format: Use JPEG format for most images. For images with transparency, such as logos or icons, use PNG format.
- Shopify Image Compression: Compress your images to reduce file size without significant loss of quality. You can use image compression tools like TinyPNG or Shopify's built-in image optimization.
- Shopify Image File Size: Keep your image file sizes as small as possible while maintaining good quality. Aim for file sizes below 1MB, especially for large images.
Remember to consult your theme documentation or reach out to your theme developer for specific recommendations, as optimal image sizes can vary depending on the theme you're using.
How to figure out Shopify theme image sizes?
To figure out the image sizes for your Shopify theme, you can follow these steps:
- Log in to your Shopify admin dashboard and go to "Online Store" > "Themes."
- Click "Customize" for the theme you want to work with.
- Look for image-related sections or options within the theme customizer.
- Click on the section or option to see the customization settings.
- Check for specific dimensions mentioned for images in that section.
- Note down the image sizes mentioned and repeat for other sections if needed.
Following these steps will help you find the image sizes specified by your Shopify theme.
How to make your image sizes equal in shopify?
To make your image sizes equal in Shopify, you can follow these steps:
- Log in to your Shopify admin dashboard.
- In the left-hand menu, click on "Online Store" and then select "Themes."
- On the Themes page, locate the theme you want to work with and click on the "Customize" button for that theme.
- The theme customizer will open, displaying a preview of your store on the right-hand side and various customization options on the left-hand side.
- Look for the section or option where you want to adjust the image sizes. This can vary depending on your theme, but common sections may include "Header," "Slider," "Product," "Collection," "Blog," or "Footer."
- Click on the section or option that controls the images you want to make equal in size.
- In the customization options on the left-hand side, look for settings related to image sizes or dimensions.
- Adjust the image sizes to be equal by entering the desired dimensions or selecting a predefined aspect ratio. Some themes may have specific options for equal image sizes, while others may require you to manually enter the same values for width and height.
- Preview the changes in the right-hand side preview window to ensure the image sizes are now equal.
- If necessary, repeat the above steps for other sections or options where you want to make the image sizes equal.
- Once you're satisfied with the changes, click on the "Save" or "Publish" button to apply the modified image sizes to your Shopify store.
Remember that the available customization options and their exact locations can vary depending on your theme. If you encounter any difficulties or specific requirements, it's recommended to consult your theme's documentation or contact the theme developer for further assistance.


